cockpit bracing during rust repairs

Wilbur Bud

Bronze forum user
Messages
10
If you've replaced floor panels or sills/rockers, where have you installed bracing in the cockpit while you were doing the work ?

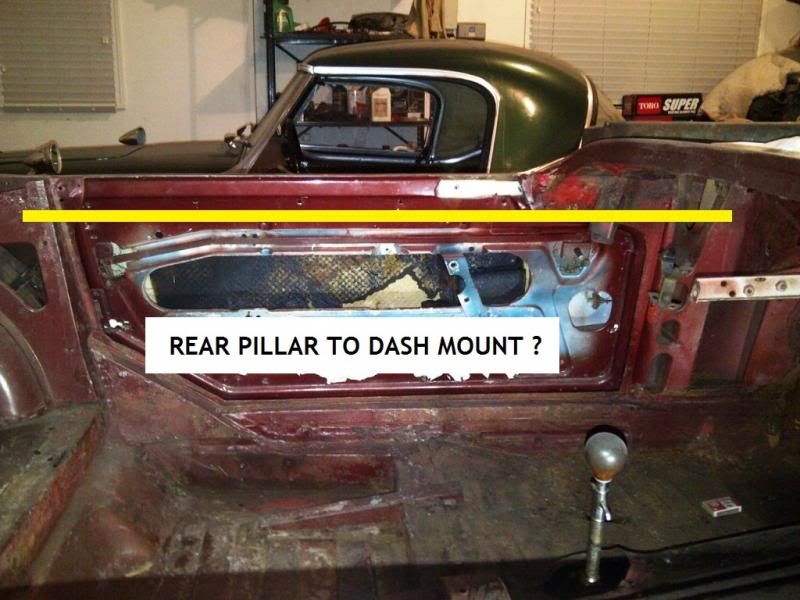
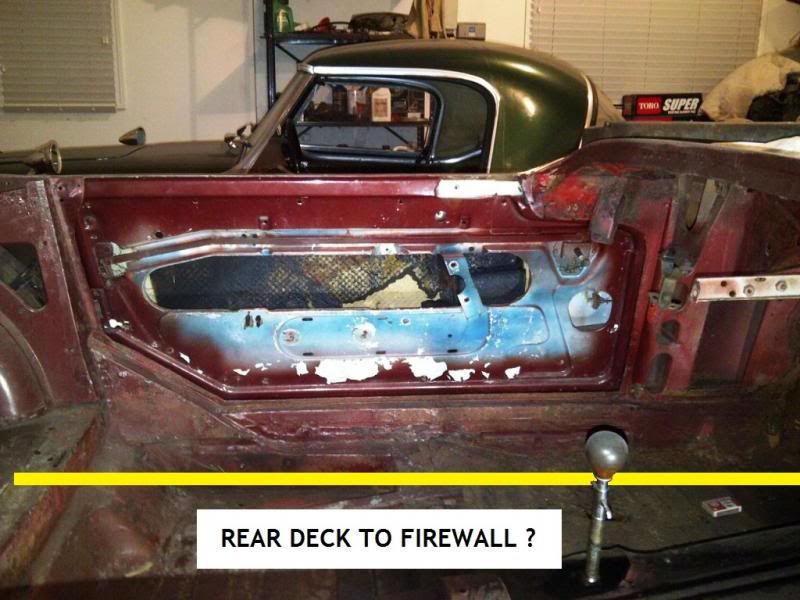
It seems like there are reasonable mounting points on the rear pillar and rear deck, but it's not so clear in the forward portion where braces could be reasonably attached and later removed . . . that little dashboard mounting piece appears convenient but maybe not be strong enough, I suppose I could run all the way forward to the firewall. In any case, could anyone that's done similar work describe please where and how they strengthened the tub while they were cutting and pasting down below ?


you can make a triangular brace that goes from the door dovetail tro the 2 door hinge mounts. This will hold the car level and allow floor/sill replacement.
 
repairs

a brace using angle iron from the A post to the B post would probably be better since the attaching points for the dove tail and the hinges are not stable. the attachment for the dove tail and the hinges move so this would not be a stable area. we bolted thru the sheet metal in the area below where the top hinges set and thru the A post in the area where the dash attachment bracket is. we did keep the angle iron level. we have one car in the shop now with this set up and there is no movement of the body.
 
Bracing

1st, Do not confuse bracing with a bracer: Important; We always make certain of the upper body spans & dimensions before bracing. Whatever jacking/hanging/push-pull is needed gets done before we brace. A rugged "X" is then securely bolted from the outboard windscreen mount holes and the rear deck boot lid hinge holes. Corner-to-corner MUST be equal length. During cutting and welding, constantly place the doors in the holes to check fit & gap. Things move when yer bangin' & clangin' . . . . . .
 
repairs

randy,
if you look at the photos of the restoration of one of my cars on my photobucket you'll see what many consider the best way to secure the body. it's a rack that the body sets in and allows you to roll the car at different angles and the body does not move. http://s606.photobucket.com/albums/tt142/65beam/
 
Very Good System

randy,
if you look at the photos of the restoration of one of my cars on my photobucket you'll see what many consider the best way to secure the body. it's a rack that the body sets in and allows you to roll the car at different angles and the body does not move. http://s606.photobucket.com/albums/tt142/65beam/

I like it! The shop Guru, however, does things HIS way . . . .I'm just the lowly boss (of something?).
 
repairs

randy,
do you remove all of the factory lead in the seams where the fenders, etc attach ? we left it in on a rust free car we bought in California and restored in 1995. the lead has now cracked at the trunk hinge area.
 
twirler rotisserie

was impressed (remember...i'm an amatuer...its easy) with this set-up at Barrett-Jackson. Simple infinite balance adjustment, fingertip rotation, and they had some stock braces for some popular makes, like mustangs...and fair pricing. For home DIY'er, seemed pretty cool to me.

I probably should have gone the full rotate route...but... I'll leave it to my son, or his future kin... or the next guy. I'm still vacuuming sand, post-blast, prime and post-paint lol.


http://www.autotwirler.us/category-s/1831.htm
 
Thanks everyone, the remarks and photos are very helpful. I've already built my DIY low-cost rotisserie and just wanted to work out the bracing before dropping the drivetrain off and elevating the unibody. I like the X-member across the top (after achieving symmetry as mentioned), and I'll probably also make a small truss for each door opening but mount to the inside so I can have the doors on when I want to check how work is progressing.
 
Lead be Heavy

randy,
do you remove all of the factory lead in the seams where the fenders, etc attach ? we left it in on a rust free car we bought in California and restored in 1995. the lead has now cracked at the trunk hinge area.

We leave the lead if it's solid, smooth & undamaged. If you've got 50 years of panel movement or rust behind it, odds are a defect may peek at ya. As a side note; After stripping, we see quite a bit of factory filler doctoring the surface on most Beams. Some of the stuff looks like a lead-asbestos mix !!!
 
Back
Top