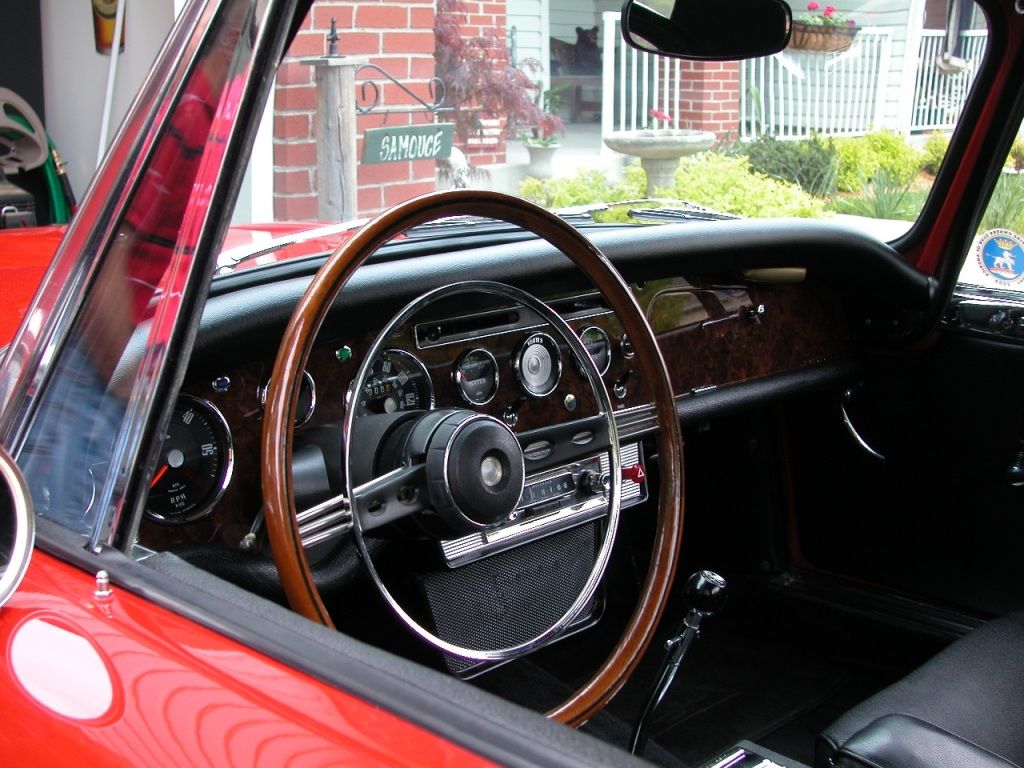
Disconnecting Stubborn Oil Gauge Fitting

H00kem

Bronze forum user
Messages
20
I am removing the dash of my 65 Tiger to refinish it. Have everything removed except for the oil gauge. The oil pressure line pressure fitting is so tight on the back of the gauge I simply cannot get it to budge. Makes me wonder if it was installed as some point with gasket sealer or some sort of sealant that it has now hardened like glue? Have tried PB Blaster penetrating lubricant to no avail. Thought that before I really put the leverage on it and risked damaging the gauge I would ask whether the fitting at the gauge is meant to be removed, whether it might be easier to remove it at the engine side and/or if someone has some tricks I might try in these situations.

Any with any experience in this situation have some ideas to remove a stubborn oil gauge pressure fitting?
 
If it were me I would just cut the oil line and remove the dash so you can
get a better idea of what's going on. If you are not careful you can rip
the fitting right off the back of the gauge and then the gauge is toast.
With the line cut the gauge will come right out and the CAT warehouse has replacement oil lines...

Moondoggie
 
No direct answer, hopefully some helpful thoughts

I also am having a go at refinishing my dash, and have been learning a lot about veneering in the process. I will be happy to share what I have learned if this is something you are also a bit new at doing and would be interested in discussing.

I am looking at the back of my oil gauge. Since I have replaced the oil line once before, what I have may be different from what you are looking at. I see that there are really two fittings on the back. The one closest to the gauge canister has a hex on it and it threads onto the gauge. It almost looks like an adapter. There is a threaded male end on it to which the oil line attaches.

Since you should be putting in a new feed line for safety reasons anyway, I would say get a new one now and see what fittings come with it. You may not need to remove anything more from the gauge than what you already have to hook up the new line. As Moondoggie noted, the CAT Warehouse lists the lines. (You would need to join CAT to be able to buy from the warehouse, but that is a good idea anyway!) Sunbeam Specialties also sells the new lines, or at least used to.

BTW, hope you have better luck than I did on reusing the plywood substrate of your dash. As I was peeling off the old cracked veneer, the plywood underneath started to de-laminate in several places. Guess 45 year old glue has its limitations... I ended up getting a piece of 1/2 birch plywood and using the old dash substrate as a pattern.

Gene
 
Thank you very much for the recommendations gents. I will take your advice and cut the lines and replace. I'll still need to get the hex fitting off the back but it should be easier out of the car.

Gene, I would be pleased to know what you have learned in refinishing your dash. I figured I would strip what I have and see what the veneer and substrate look like and go from there. Any advice would be welcome!
 
I will take your advice and cut the lines and replace.

Here is what I recommend for refinishing your dash -

DSCN4060s.jpg


http://www.prestigeautowood.com/
 
When you get the gauge out, you will notice there is a couple of slots on opposite sides of the gauge can where the feed line attaches. I expect they are intended to be used to hold that part of the connection steady as you wrench off the hex attachment. That should avoid the twisting off of the gauge part of the connection while removing the hex attachment. Some internal/external ring pliers with 90 degree tips ought to work.

As for the dash, I would say decide up front how much time you want to spend and how much money you really want to spend out of pocket. The cost can add up pretty quick in both categories. There are some really nice ready-made replacements out there. Several Forum members have great things to say about the ones made by Richards (?) in Georgia. Sunbeam Specialties has two grades of replacement dashes, priced accordingly.

I found that as I took the old veneer off, the surface cracks one sees in the burl wood are reflections of cracks in the plywood layer underneath it. That is when I started to see how that skin layer of the plywood was not holding on itself too well.

Remember too that both the front and back of the dash should be veneered with the same type of veneer to keep stresses equalized and avoid warping stresses (even though the dash is bolted down). You will see that both the front and back of the original dash is veneered. If the front is coming off, chances are the back is too. So in figuring cost, one needs veneer for both the front and back.

To do the job successfully, I have ended up making a cold press, which has added a bit of time and unexpected side expense. I tried to get away with just using a bunch of C clamps and a couple of melamine shelving boards but the bonding was poor in too many places.

PM me with your email and I can get into the subject off line a lot more if you like.

BTW, I see you are from Texas and obviously a Longhorn fan. FWIW, I grew up in the Texas Hill Country northwest of San Antonio and graduated with a BSEE from UT in 1967. Headed for a job in aerospace in California and bought my Tiger as a graduation present for myself!

Gene
 
Dash etc

There has been a project dash for sale on e bay and the pattern he used in its construction.
http://www.ebay.com/itm/Sunbeam-Tig...t=Vintage_Car_Truck_Parts_Accessories&vxp=mtr
Not related,

A glove box door would be nice, every time the car hits a bump and is working the corners everything bounces out onto the floor.

Our esteemed president looked at my car knew the name of the craftsman reproduced it. If I could get a door and or a set of hinges I'd think about the project.

It seems like with my limited exp. in doing varnish on sail boats the doing a dash is very user friendly especially with a Rockler store near by.
 
dash

Hi Warren, it was the place Duke linked to above- Prestige Autowood.
They also make them for Rick at Sunbeam Specialties.

When I bought my first car the dash was pretty far gone. I sanded the old veneer and clear coat off and got it down to the underlying baltic birch. While I was shopping around for burled walnut I had my first look at the dash that Prestige makes. It took me about 3 seconds to realize that his product was far superior to anything I would have ended up with on my own and bought one.

I'm pretty sure his clear coating is some kind of polyester resin and as you know that stuff is pretty brutal to work with.

regards
Bob
 
There has been a project dash for sale on e bay and the pattern he used in its construction.
http://www.ebay.com/itm/Sunbeam-Tig...t=Vintage_Car_Truck_Parts_Accessories&vxp=mtr
Not related,

A glove box door would be nice, every time the car hits a bump and is working the corners everything bounces out onto the floor.

Our esteemed president looked at my car knew the name of the craftsman reproduced it. If I could get a door and or a set of hinges I'd think about the project.

It seems like with my limited exp. in doing varnish on sail boats the doing a dash is very user friendly especially with a Rockler store near by.

I was considering re-veneering the dash I made a few years ago as I'd like to add a door... and then I found this one in the UK...
http://www.ebay.ca/itm/281022248802?ssPageName=STRK:MEWNX:IT&_trksid=p3984.m1497.l2649

It arrived yesterday and looks pretty good... had to make a couple adjustments but excellent price!


Jim
B382000446
 
Well, I let the penetrating oil soak on the fitting for a week and took a wrench to it again and voila, it came off clean! Thanks for all the advice gentlemen.

As for the dash condition, its pretty good. Definitely veneered plywood. I have rough sanded it and am now finish sanding. I am going to give it some stain when done and the spray 10-12 coats of varnish to see what it looks like before deciding whether to stick with the original or buy a new one. The idea of having a glove box door is very appealing but for $400 I'm not yet sold unless it looks like the original is going to look like a plain varnished piece of plywood. We will see how it comes up.

Fortunately all of the instruments have cleaned up very nicely. Some had lots of white flexs on the inside glass which I discovered to be flaking paint from the painted walls of the instrument interior. Don't quite know why they painted the walls (reflection? rust proofing?) but I have cleaned them up and they now look new.

Two of the instruments do not work. The clock, which I may send off for repair and the Tach which I understand from reading a write-up on this or another side is a really weird gizmo. I have applied 12volts directly to the clock and it definitely does not work. Maybe I'll get lucky and the Tach problem is due to a poor collection. Anyone know how best to test the Tach when it is uninstalled from the car? I'm pretty good with a meter if I know what conditions and readings I was looking for.
 
Clock repair

Glad to hear the good news on all the projects.:D

Before you send out the clock for repair, try pushing the hands reset shaft. Sometimes that has to be done to get the clock started. (That info is stamped on the back of most of the cases, which you may not have seen.) Also be sure you have the battery power connected correctly. Over the years some people have put in positive earth (ground) clocks. They will work because the wooden dash does not ground the clock case...

If that still does not work, do a search here on the forum for Smiths clock repair. You will find info and contact details for Mike Eck. At least two of us have used him and have great praise for him and his work. Plus his price is about half of Nisongor, as I recall.

The clocks have a design flaw that causes them to burn up some delicate contact points in the electromechanical switching part of the clock. They lasted at best for a few years when new. The best fix is to replace that part of the mechanism with an electronic circuit board.

Mike's fix is quite professional and the clock has the same gentle tick-tick sound of the original mechanism. Again, he charges about half of what Nisonger charges. I highly recommend him.

Gene
 
Last edited:
Thanks Gene. You guys are most helpful. I very much appreciate it. I'll let you know what happens and I will post pictures of the dash once it is further along. Kevin
 
Regarding your tach not working...

The original tachs (RVI types) were pretty crude, inaccurate instruments by today's standards. Except for pertronix ignitions, they usually do not work with electronic ignitions. Sometimes even a little tweak was necessary to work with the pertronix. Is that your situation?

Some people have upgraded to 7000 autometer tachs with an original dial face from an Alpine, etc. Do a search on the forum here for some of that discussion.

If you want to learn more about the original tachs and some rebuild info you might try, check out www.sunbeamalpine.org/downloads/alpine_tach_repair_rev5.pdf. The Alpine tachs and Tiger tachs are pretty much the same internally, except for where the variable resistor is set.

Are you familiar with the tigersunited.com web site? It is a great resource of Tiger info and tips compiled over the years. Some tach info there as well.

Hope some of this will get you started in the direction you want to go.

Gene

BTW, when you get ready to finish the sanded dash, you might want to consider giving it a dark walnut stain first. Something like the steering wheel color. Get you somewhat closer to the look of the original dash, if that would be important to you. Just a thought.
 
Back
Top