Kens Tiger - B9471532

KenF

Gold forum user
Messages
396
I figure since I bought the Tiger from my neighbor and it now sits in my shop (as told here), I'd start a new thread on its progress. I know Mustangs well, but not Tigers, so I welcome the guidance. My goal over the next month or two is this:

  • Join CAT (Done!).
  • Strategy for now is to leave as much as possible unrestored, and replace only as needed to safely and reliably drive.
  • Get car onto jack stands. I need to figure out the best way to jack the front without doing damage (Done!).
  • Remove wheels and have tires dismounted. Get wheels checked to see if they're usable.
  • Rebuild brake system.
  • Rebuild clutch master/slave system.
  • Replace fuel tank rubber parts.
  • Might drop oil pan, who knows what sludgy stuff is laying down there.
  • Change all coolant related hoses.
  • Hope the radiator and heater core don't leak.
  • Start rounding up parts that are missing.
  • Figure out what to do for wheels/tires.
  • Once running, get it TAC'd. Maybe I should request this now.

So it begins.
IMG_4406.JPG

Yeah, ain't going to use this toilet paper oil filter! Can't believe people used these things. Today's paper probably wouldn't last a minute. I want to remove it anyway so I can see the engine assembly date.
IMG_4405.JPG

The American Racings mags have no cast markings or stampings on the inside. Surprisingly no curb rash on them. I don't know what I'm going to do with these, really not too wise to ride them hard, if all all.
IMG_4396.JPG

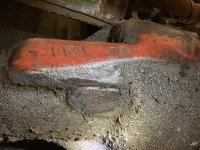
And what is this painted numbered tag on the cowl? Says JAL 560992.
IMG_4404.jpg

I also want to check the numbers on the trans and diff. I know the block number and casting date locations, but not the others. Any hints what to look for? Or any other advice for a car that's sat for a long time.

Thanks, Ken
 

HolyCat

Gold forum user
CAT Member
Messages
1,243
Great Start

Ken,

Making a plan (list) is a great start and you have got good items listed. You might want in include pressure testing your heater core out of the car - you don't want any leaks to make a mess inside your car.

One problem with Tigers is that it may appear that some electrical item does not work, but the problem is a BAD GROUND. You might want to clean the grounds now before you get frustrated hunting down an electrical gremlin.

The JAL tag has a number on it that is a unique body ID number. It is not the VIN number. You will hear about the Jensen ledgers. This is a factory list of Tigers produced. For each VIN number listed, the JAL number is listed.

It would make sense to get the car TAC inspected before you get very far into work on it. While a car that has sat for decades is not too likely to be a converted Alpine, do you want to spend the same amount of time, effort, and money if it is an Alger?

Good luck with your new project!
 

Warren

Gold forum user
Messages
3,872
John Wayne

Had a little known toilet paper product that didn't take ___ off of anyone.


If Bruce is your local pal he has a keen eye for the Tiger. TAC is nice but few survivor cars could be dressed as yours is. With a 1975 pink issuance I'd double down on the reality of the car as a fine example. The old cached pages show an unclaimed * on it .


I am at the same phase of a restart , thinking on the electric drill to run the oil pump. Have already sprayed fogging oil by Stabil down the plug holes turn over by hand slowly. Good stuff since Mrs. can't bring me home syringes from work I'm buying sore bought spray oil. My pals like that Marvel stuff and my Model T buddy says go 2 stroke fuel on start up.


The rack could be real stiff amazed it didn't split its gaitors and dump the oil down the street. I have changed em and filled up rack in car but it's raise one side and lower the other. Oh and add a Gano filter and skip the heater core for now no sense risking filling it with chunks of cast iron.


http://sunbeamtiger.org/index.php/tac-menu/tac-procedure.
Keep up the good postings.
 

Forrest39

Gold forum user
CAT Member
Messages
406
Ken,
Congrats on the excellent score! Looks like a nice body with just a few mechanical challenges to deal with. I got a project that had been sitting for 30 or so year and got it running. I made a post at the end of this thread describing my plan. Perhaps some of this might be helpful.
http://www.catmbr.org/VB_forum/showthread.php?t=5546
I think you have an excellent plan of attack, and you are doing well by posting any questions you have. You will find this is a very helpful and well intentioned group. I agree with Warren that it’s not likely that your car is a fake as very few people were going to that effort 30 years ago. Perhaps Bruce can come look at it and point out a few things. I’m in Hollister so a little bit far for a visit, but I will gladly if you can’t seem figure something out or would like a second set of qualified eyes to have a look.
Ask all questions and I think you will get excellent answers!
Cheers, -Kevkn
 

KenF

Gold forum user
Messages
396
Thanks for the links and info Forrest and Warren. I sent email to get TAC process started.
I also found a 4G21A (7/21/1964) assembly date stamp on the block, that’s a good sign and seems to fit the VIN date range.
 

michael-king

Gold forum user
CAT Member
Messages
4,145
Ken,

As i mentioned in the other thread, the american racing wheels are great and appear to be the magnesium model... They get fragile with age. If using them be gentle with the throttle.

Alternatively there are repro alloy versions now known as the " silverstone" wheel avaialble.. Also in 15" if you want.
 

KenF

Gold forum user
Messages
396
Ken,

As i mentioned in the other thread, the american racing wheels are great and appear to be the magnesium model... They get fragile with age. If using them be gentle with the throttle.

Alternatively there are repro alloy versions now known as the " silverstone" wheel avaialble.. Also in 15" if you want.

I think magnafluxing only works for steel. After I get the tires off, maybe I’ll check around and see if I can get them x-rayed. If no cracks I may use them, don’t know. I guess I’d have to carry a class D extinguisher. :). Yeah, gotta think about this one. I ran magnesium Pantera wheels on my 66 Shelby for years before I finally buying some 16’s, the offset on them are perfect for Mustangs.
 

KenF

Gold forum user
Messages
396
I talked to “Rick” tonight, who was the owner from 75 to 2019. He bought it from the original owner in Stockton, California. Said he parked it when the fuel tank hoses started leaking, but it still ran good. In the early 80’s he hit some ice on the road to Tahoe, and spun the rear into a sign post. That’s when repairs were done to the trunk and a door and the whole car repainted.
I found a stamping on the differential housing, L64 1211. Not sure if that correlates to anything else.
 

Attachments

  • F836FD04-404E-4C03-B287-6851B565310C.jpeg
    F836FD04-404E-4C03-B287-6851B565310C.jpeg
    5.1 MB · Views: 175

KenF

Gold forum user
Messages
396
I think the shifter is going to have to be removed, that Home Depot reverse lockout fix just ain't working for me. Shift boot is on order from SS.
IMG_4410.JPG
 

Forrest39

Gold forum user
CAT Member
Messages
406
I think the shifter is going to have to be removed, that Home Depot reverse lockout fix just ain't working for me. Shift boot is on order from SS.
View attachment 11527

Ken,
The shift bar that is missing is the same as the early Mustang that you are familiar with. Bill Heeley rebuilds those and can set you up. He can also rebuild the whole shifter are return it with new chrome and whatever parts are missing. His contact info is available in the 'parts and services white pages' at the top of the forum. He did one for my stock car and it came back better than new.
Cheers, -Kevin
 

KenF

Gold forum user
Messages
396
Seems I'm becoming SS's best customer lately! Bought the brake and clutch master cylinders, and clutch slave. The clutch pedal spring around clevis was broke, and the circlip for the spring was missing, which I haven't seen listed in any catalogs. I've got the circlip for the brake, but it looks like the new clevis won't fit in the bottom of the circlip. For the clutch I made one from a fender washer, but not sure if it will work, it looks to me like once installed and adjusted it's going to compress the pedal spring too much, need to check that.
IMG_4479.JPG

Got the brake calipers rebuilt with new stainless pistons, without separating halves. There were a few pits on the piston holes, but pistons moved freely after a LOT of scrubbing. Cleaned the piston seals groves good and hopefully the seals will do their job. Insides are clean, but left outside cruddy as is. ;) Hub bearings feel fine, so just going to repack them, new seals and install them. Rotors measured .503", so I think that's good. New hoses on the way from CAT.
IMG_4473.JPG

Probably remove the rear drums today. Hopefully the wheel cylinders are rebuildable, but likely I'll be calling SS again.

And, bought a set of used 14" PanaSports.
IMG_4461.JPG
 

Forrest39

Gold forum user
CAT Member
Messages
406
Road trip?

Though it might be a few hour trip, maybe consider taking a trip down to SS and do some window shopping. Rick and Larry are very friendly and it would give you an idea of the types of things they have in the shop.
I'd even meet you there to say hi!
-Kevin
 

KenF

Gold forum user
Messages
396
Though it might be a few hour trip, maybe consider taking a trip down to SS and do some window shopping. Rick and Larry are very friendly and it would give you an idea of the types of things they have in the shop.
I'd even meet you there to say hi!
-Kevin

Yeah, maybe when I get it running I'll take a drive down there, I'll let you know.

Got the clutch master cylinder mounted using the second hole on the pedal farthest away from cylinder. Looks like the geometry is right, but haven't bled it yet. Home Depot washer is working for the spring. "Adjusted" the rubber cover on the cylinder as it was making an annoying popping sound when pedal was depressed.

IMG_4481.JPG
 

Warren

Gold forum user
Messages
3,872
Same job

What a hassle really needed an S 1/2" wrench to remove lower bolt but ended up using a shortened cheapo open end into a stubby 2.5" and a little whack with a hammer. On re assembly the zip tie method to compress the spring makes for less time with your head under dash :)
 

KenF

Gold forum user
Messages
396
I guess I'll call my buddy Larry at SS and order everything they've got for rear brakes. Drums seen fine, haven't measured them yet. Waiting for the servo bypass line to arrive so I can flush the lines. I'm thinking of gambling on the rear seals and assume they're okay. Bearings feel fine.

Brake1.jpg

Brake3.jpg
 

KenF

Gold forum user
Messages
396
Got the clutch master cylinder mounted using the second hole on the pedal farthest away from cylinder. Looks like the geometry is right, but haven't bled it yet. Home Depot washer is working for the spring. "Adjusted" the rubber cover on the cylinder as it was making an annoying popping sound when pedal was depressed.

View attachment 11557

Okay, got the correct pedal spring circlip. No more Home Depot stuff!
IMG_4516.JPG
 

KenF

Gold forum user
Messages
396
Brake Work

A little progress on the brakes. Ordered new master cylinder, wheel cylinders, caliper rebuilt kit, pads, shoes, brake hoses and servo bypass hose.
Maybe some day I'll have the original Girling master cylinders sleeved, but I'll run these for now.
IMG_4527.JPG

Repacked the bearings, replaced the front seals, and installed new pads in the rebuilt calipers. I'll let the pads resurface the rotors. ;)
IMG_4525.JPG

New wheel cylinders, springs, and shoes on the back. Girling Adjusters cleaned up good. I'll retorque the axle nuts once my handbrake is working. I'm hoping the wheel cylinders stay put, it looked like one of the clips was a bit worn where it's suppose to lock into the retainer spring. I didn't see any of those clips available anywhere. Time to get Sandee out there to help me bleed the brakes. :)
IMG_4524.JPG

I took a shot at tearing down the servo, hoping I could use the rebuild kit I have on hand, but it looked a bit beyond my tools and capabilities to get working. So, installed the bypass line for now. I'll see how hard the pedal is. It can't worse that my old 66 GT-350 with the factory segmented metallic shoes and semi-metallic pads, we'll see. I may send servo off to White Post if needed.
IMG_4518.JPG
IMG_4528.JPG
 
Top