Kens Tiger - B9471532

KenF

Gold forum user
Messages
396
Be sure to check your fan shroud fitment. My project has some funky 3 row core radiator with stock looking tanks, but when I tried to fit the fan shroud, there were issues. That part is still down the road for me so I haven't addressed it yet, so I can't elaborate more. I'd hate to see you spend's some bucks on a radiator that might not fit right.
-Kevin

Yes, looked like the fan shroud fit fine before pulling the motor, and fan turned without hitting anything. It does have one of those funky green fiberglass fans available back in the day, I need to hunt down an original.

I'd also like to get a tag for the 2100 carburetor, which is missing. Can someone send me a picture of one off a Tiger so I know what to look for? Better yet, if you've got one laying around you want to sell, let me know. I know, I know, I should put a 4 bbl on it. :)
 

KenF

Gold forum user
Messages
396
Fuel Tanks

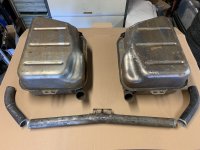
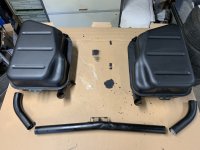
Well, spent 4-5 hours putting the fuel tanks back in. Sheesssshhhh! I feel like I went through a rite of passage to the Sunbeam universe! Haven't tested for leaks yet, hopefully the new hoses and original clamps hold back any leaks. Had the tanks and tubes boiled out, and a little solder on one of the fittings. I left them bare on the inside, I'll just be sure to keep them full.
IMG_4581.JPG

Repainted them black, should have went a bit glossier like they were before. Did end up removing the paint where the hoses slip over the fittings to ease slipping those dang hoses on with the help of some Dawn soap.
IMG_4584.JPG

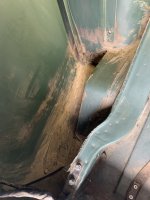
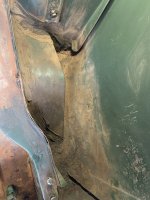
The trunk drops looked good, very little rust.
IMG_4586.JPG

IMG_4587.JPG
 

Warren

Gold forum user
Messages
3,872
BaT

There was a rusty Tiger on BaT . I think I saw a carburetor tag shot on it.
It also has some nice motor shots .
It's the rust tinted white one.
 

KenF

Gold forum user
Messages
396
Yeah, I saw that one, $17,250 + shipping to UK, plus a weak Lb vs Dollar. I couldn't make out all the characters on the carb tag.

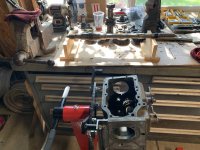
Work continues...I noticed a very small leak on the 3-4 shift lever, so I decided to order a rebuild kit from Dan Williams since I've got to take it completely apart to get to the o-rings. Everything else looked good. Didn't use those plastic thrust bearings Dan included, used my old ones. I was going to call and ask him about them vs the metal ones, but didn't. Should have it back together tomorrow.

IMG_4624.JPG
 

KenF

Gold forum user
Messages
396
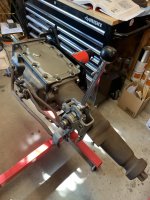
Got the toploader back together. Also bought a replacement short shifter handle from Bill Heeley since mine had a busted reverse lockout pull.

IMG_4630.JPG
 

Warren

Gold forum user
Messages
3,872
Vent

There was a trick to slow the vent from spewing when hot that seems a good idea.
Only rebuilt one with Maliburevues watchful eye we did 3 that weekend.
I don't remember what it was but it sure sounds like a good idea to have less anti rust coating ...
 

KenF

Gold forum user
Messages
396
There was a trick to slow the vent from spewing when hot that seems a good idea.
Only rebuilt one with Maliburevues watchful eye we did 3 that weekend.
I don't remember what it was but it sure sounds like a good idea to have less anti rust coating ...

There was a new vent included in the kit, but I didn't feel like drilling and tapping a hole in the tail shaft. A little auto rust preventative never hurt a Tiger. ;)
 

KenF

Gold forum user
Messages
396
Slow Going...

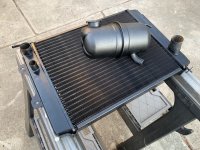
It's been slow going, over 2 weeks since motor was dropped off at shop, :mad: . I knew he was busy, but I've got a Tiger to put back together. :) I did get the radiator back, unpainted, and it did need a core. The expansion tank needed a little silver soldering. Put a less than perfect paintjob on the expansion tank to somewhat match the rest of the engine compartment. The heater core checked out good, it had a brass tag from a Stockton, CA shop soldered on the side so it has been worked over in the past. Minimal paint sprayed on radiator for efficiency's sake, a dusting on the fins and matte finish on tanks. Bought a Derale 15" Flex fan 17015, hopefully it will fit without much "adjusting," and clear the rack and shroud.

IMG_4644.JPG
 

Forrest39

Gold forum user
CAT Member
Messages
406
Looks good Ken. Be sure to check the clearance on your rack with that fan - I have that one on my personalized car and the fan did a bit of "self adjusting" on a bumpy road. I will go back and trim it at some point...
With your radiator, how many row core did you get? I read that there are a few options, but not all will work with the stock shroud.
Cheers, -Kevin
 

KenF

Gold forum user
Messages
396
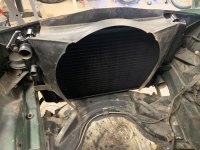
It's a 3 row, middle row is offset between the front and back rows, like the original. Measures 1 3/4" thick. I did give them the Go Dan VT Windsor core #128366 I found in a different thread. They mentioned Go Dan was bought out by the company they were buying the core from, not sure if true. I doesn't look like it's brass, and a lot lighter than the original.

I read that there are a few options, but not all will work with the stock shroud.
Cheers, -Kevin

That got my attention to bolt it up and do a test fit! Looks like the shroud fits fine. I do see it's important to get the front of the radiator frame flush with the tanks instead of centered, moving the radiator tanks back away from the vertical radiator supports.

IMG_4645.JPG
 

HolyCat

Gold forum user
CAT Member
Messages
1,243
Motor Mounts

With a larger fan, please check periodically. Some of the motor mounts out there are known to sag over time, lowering the fan blades enough to hit the steering unit.
 

0neoffive

Gold forum user
CAT Member
Messages
2,865
Skinny Rubbers

With a larger fan, please check periodically. Some of the motor mounts out there are known to sag over time, lowering the fan blades enough to hit the steering unit.

I've noticed that the new molded Ford (by others) mounts have a thinner rubber cross section. This automatically requires shimming the big bolt with large washers or a slice of plate steel. The head bean counter must be saving 2 pence per unit!
 

KenF

Gold forum user
Messages
396
I've noticed that the new molded Ford (by others) mounts have a thinner rubber cross section. This automatically requires shimming the big bolt with large washers or a slice of plate steel. The head bean counter must be saving 2 pence per unit!

Thanks for the info, will definitely check clearance. I cleaned and checked the motor mounts, which look fine. Part numbers C3AA-6038-H-RH and C3AA-6B032-H-LH, maybe they've been replaced before.

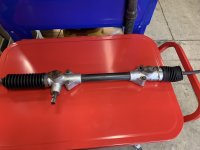
Since the motor will be in the machine shop for a couple more weeks, working on other stuff. Cleaned, drained the rack, and replaced the bellows. Filled with 8 ounces of the Brad Penn GL-4 80W-90 oil I bought for the toploader. Didn't have a warm and fuzzy feeling about using the plastic cable ties to seal the boots, so reused the clamps. But I'd rather use more original looking clamps which are probably some MG clamp, maybe like this, which are too small (2"). Moss didn't know what to recommend, of coarse. Not sure which British car has similar rack/bellow end sizes (.5" - .8" and 2.2" - 2.4").

Anybody have a more original looking big and small clamp source (non Oetiker) that doesn't look so much like an Autozone radiator hose clamp?

Thanks!

IMG_4657.JPG
 

Warren

Gold forum user
Messages
3,872
Rack ties

Yes I think we all hate using zip ties in play of the metal strip pull ties that are stock. I think I saw some on Moss , as well but the picture was not great and at under 3 bucks a piece and since that was all I wanted I gave up.
I also gave the rack a little rub down will grease like the MG racks suggest, and it's slick as can be.
In the manual there's front end torque specs. be sure to check those out.
Keep up the good work...
 

KenF

Gold forum user
Messages
396
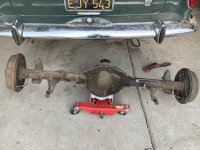
Well, since I've got a couple weeks, I decided to wipe down the wheel wells and bottom with solvent and/or cleaner. I must be bored. :confused: Looked at the rear end, and since the brake lines are empty and the exhaust system is going to be replaced anyway, figured it'd be easier to pull the rear out to give it a good cleaning and exam. Center section is coated with pretty thick layer of oil and dirt, I'm curious as to how much oil will drain out of it.

IMG_4660.JPG

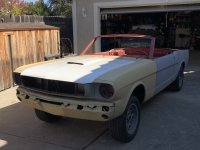
And, got the body panels hung on my wife's convertible and almost ready to drop it off to the body $hop, so I've got more extra time for the Tiger.

IMG_4650.JPG
 

KenF

Gold forum user
Messages
396
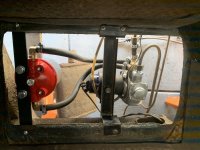
Installed a new AZX1308 SU Fuel pump, and added a fuel filter before the pump. No shutoff valve to filter so I'll just have to plug line when changing filter. Not too thrilled about this cooking above the muffler. May look at muffler shield in future, although moving to trunk is obviously the best solution. Should also add inertia switch in case some idiot rear ends it.

IMG_4665.JPG
 

0neoffive

Gold forum user
CAT Member
Messages
2,865
Hmmmmm

Installed a new AZX1308 SU Fuel pump, and added a fuel filter before the pump. No shutoff valve to filter so I'll just have to plug line when changing filter. Not too thrilled about this cooking above the muffler. May look at muffler shield in future, although moving to trunk is obviously the best solution. Should also add inertia switch in case some idiot rear ends it.

View attachment 11738

Interesting plumbing solution. Not sure I would have used all that rubber in a high heat area ! :eek:
 

KenF

Gold forum user
Messages
396
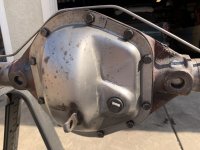
Got the rear end housing cleaned and back in. One of the dirtiest greasiest hardest part I've ever cleaned! I was surprised the cover wasn't painted black, just bare steel. I guess the oil saved it from rusting. With all that oil on the housing I figured the pinion seal must be bad, but didn't look like it was leaking. Checked the oil level and it was only a 1/4" low, so I'm going to assume seal is okay (regret later probably).

IMG_4670.JPG

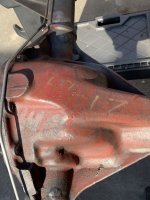
Just cleaned, not repainted, save that for if/when car is restored. Noticed a yellow paint stick marking that looks like 49-17, which matches the tag. And the red oxide paint has some runs.

IMG_4673.JPG
 

hottigr

Gold forum user
CAT Member
Messages
823
Was there anything attached to that tab welded onto the back of the diff housing?
 
Top