Kens Tiger - B9471532

KenF

Gold forum user
Messages
396
Damper Sleeve

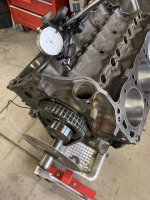
Noticed the harmonic damper had a worn groove from the seal. Instead of trying to adjust the seal in the timing cover to ride the surface at a slightly different location, decided to install a sleeve on the damper.
IMG_4727.JPG

Put the damper in the freezer for a few hours, and the sleeve in boiling water right before adding a little sealant and pressing on using a wood block. New diameter is 1.900 vs the original 1.875, should work fine.
IMG_4728.JPG
 

KenF

Gold forum user
Messages
396
Yea! finally got the engine back from the shop yesterday. Had to go .030 over, SilvOLite flat top pistons, .010 under on the crank. New valve guides and seats, 289 valves, mild RV'ish 289 cam, Fel-Pro gaskets, once you're in the shop it adds up. Their work looks great, and should run good. Sprung for the the roller timing chain, PRW roller tip rocker arms.
IMG_4767.JPG

Got the lower end put together today.
IMG_4781.JPG
 

spmdr

Gold forum user
CAT Member
Messages
367
Do you know the Cam timing?

You are at a stage where you can greatly influence the performance of even a "stock" engine.

If you would be very happy with a ______ (fill in the blank with any less than complimentary term for a BORING 260 engine), then go about your assembly.

If, however, you want to BREATH some new life into the Old 260, consider checking/ adjusting the Installed Cam Timing. :------

DW
 

KenF

Gold forum user
Messages
396
If, however, you want to BREATH some new life into the Old 260, consider checking/ adjusting the Installed Cam Timing. :------

DW
So, I could advance it by 4 degrees to get a bit more low end, right? Especially with the close ratio trans. I haven't checked the valve timing yet. Lift and duration is higher, so I need to check intake valve clearance, more so if advanced. I mostly went with my builders recommendation on the cam, told him it's for a Tiger (he knew what it was at least), exhaust manifolds, 2 bbl, etc. And the press-in studs. Everyone has their favorite cam I suppose, here's the specs for mine:
IMG_4782.jpg
 

spmdr

Gold forum user
CAT Member
Messages
367
That cam is quite popular and a good choice.

However, it is commonly installed out of the box without checking the timing,

OR, as you suggest, Advancing the cam.

BUT, the cam is intended to be 4 deg advanced WITHOUT adding any more.

What I would suggest is REMOVING some of the advance built into the cam.

AND/OR (at least) check to make sure no more advance is ADDED to the cam timing.

260 Tigers don't usually suffer from too little low-end Torque, but they DO

have a reputation of lackluster higher RPM.

Taking OUT some (or all) of the cam advance can add a stronger higher RPM (3500-4500).

...even with JUST a 2V carb.

Of course, a BIGGER 2V Carb = more :------
 

KenF

Gold forum user
Messages
396
BUT, the cam is intended to be 4 deg advanced WITHOUT adding any more.

What I would suggest is REMOVING some of the advance built into the cam.

AND/OR (at least) check to make sure no more advance is ADDED to the cam timing.

Thanks for the info on this cam, appreciate it. I measured it straight up and got intake open @ -7, close @ 31, exhaust open @ 43, close @ -9, very close to specs. If it's already got 4 degrees advance built in as you say, I'll think I'll run it straight. I asked builder today and he said it's going to be done at 4500.
 

Attachments

  • IMG_4783.JPG
    IMG_4783.JPG
    318.3 KB · Views: 101

Maliburevue

Gold forum user
CAT Member
Messages
221
Gearing

IMO the best thing you can do for daily performance is to convert the close ratio trans to a wide ratio. Getting off the line will be a breeze so you'll avoid burning up your clutch, and you'll still have the tall rearend gears for highway cruising.

Gary
 

KenF

Gold forum user
Messages
396
IMO the best thing you can do for daily performance is to convert the close ratio trans to a wide ratio. Getting off the line will be a breeze so you'll avoid burning up your clutch, and you'll still have the tall rearend gears for highway cruising.

Gary

I've been thinking about that lately. As much as I'd like to keep car original, this is one thing that makes sense for me to do, and would be easier doing it now versus later. And I won't have to explain to my kid or grandkids when they take it for a spin how to get it rolling.

I need to decide if I should round up a wide ratio trans or rebuildable core, and put my close ratio on the shelf. Or just replace the gearset in what I have. I'd prefer the first option.

So, my search begins. I'll place a want ad if I can't find anything locally.

Also, anyone heard anything about using Dan Williams 33 tooth first gear for a 2.90 ratio? Seems odd to me that you can just drop in a gear with an extra tooth and still have correct gear geometry.
 

Maliburevue

Gold forum user
CAT Member
Messages
221
2.90 First Gear

Using the 33 tooth 2.90 first gear was my next suggestion. I've helped over a dozen Tiger owners convert to a wide ratio setup with the 2.90 first gear and they all love it. Dan Williams is the only one who stills carries them. David Kee and Allstate Gear no longer stock them. I do use Allstate gear for all my toploader gears. They are cheaper than Dan Williams.

Gary
 

steven

Gold forum user
Messages
875
Using the 33 tooth 2.90 first gear was my next suggestion. I've helped over a dozen Tiger owners convert to a wide ratio setup with the 2.90 first gear and they all love it. Dan Williams is the only one who stills carries them. David Kee and Allstate Gear no longer stock them. I do use Allstate gear for all my toploader gears. They are cheaper than Dan Williams.

Gary

Yep I am a convert, wide ratio box with cogs from a mustang and a new first cog for get up and go with the lower rear ratio, 4th gear is an overdrive and no external mods
 

KenF

Gold forum user
Messages
396
Noticed the left front bumper bracket felt kind of squishy, went to tighten it and found this previous hack repair. Not sure what happened in the past, the front sheet metal looks pretty good except for this one area.
IMG_4758.JPG

Removed about 1/8" of the side rails, and cut a piece of 12 gauge to fit.
IMG_4760.JPG

Waiting for my friend, who's a lot better welder than me, to come over and weld the nut and around 2-3 sides of the plate.
IMG_4763.JPG
 

0neoffive

Gold forum user
CAT Member
Messages
2,870
Not Unusual

Noticed the left front bumper bracket felt kind of squishy, went to tighten it and found this previous hack repair. Not sure what happened in the past, the front sheet metal looks pretty good except for this one area.
View attachment 11775

Removed about 1/8" of the side rails, and cut a piece of 12 gauge to fit.
View attachment 11776

Waiting for my friend, who's a lot better welder than me, to come over and weld the nut and around 2-3 sides of the plate.
View attachment 11777

That's a very common ailment for these critters. Yes, to the good welder who will adjust penetration for the different thickness metals.
 

KenF

Gold forum user
Messages
396
Thanks to Bryan for offering up his spare wide ratio trans that he laying around! It was just rebuilt by Dan Williams and collecting dust in his garage. I ordered the 2.90 first gear, should be good to go and my close ratio will be relegated to the shelf.
 

Attachments

  • IMG_4790.JPG
    IMG_4790.JPG
    328.3 KB · Views: 96

0neoffive

Gold forum user
CAT Member
Messages
2,870
Another Wide Ratio Trans

FYI: Stealing Thread. We also have a client's wide ratio trans here gathering dust. Rebuilt by Dan Williams and shelved, not used. PM if interested and I will give you client contact info.
 

KenF

Gold forum user
Messages
396
The engine is ready to go. All clearances check out, primed to make sure oil got to all rocker arms. Had to bend the baffle on the left valve cover a bit to clear the PRW roller tip rocker arms and polylocks. Good thing I checked the camshaft endplay, as the timing gear was made for a .250" thick cam retainer plate versus the original .213". Machine shop had an extra one laying around.
IMG_4787.JPG

Since the car is unrestored and definitely needs paint, etc., I wanted a matching looking engine, not all bright, glossy painted, and shiny to stick out as newly rebuilt. I attempted to give it a fauxtina finish by leaving some areas just cleaned, unpainted, or different types of satin and flat black and gray paint to make it look old. Hopefully it won't be too obvious it's a new motor, but just run like one. Maybe in the future a pretty 289 will be there.
IMG_4799.JPG

IMG_4801.JPG
 

KenF

Gold forum user
Messages
396
Got the new 2.90 first gear installed in the new wide ratio trans. At least I didn't have to tear it completely apart, just down to the hardest part, removing and re-pressing the rear bearing off and on again. Always fun doing that. Dan Williams stamps and engraves everything on his work, no mistaking it's his and the parts he rebuilt them with if ever returned. He said he always stamps a heart, anchor, and horse on the top, among other markings.
IMG_4813.JPG

The old 32 tooth and new 33 tooth first gear.
IMG_4807.JPG

Engine is off the stand and almost ready to install.
IMG_4806.JPG
 

KenF

Gold forum user
Messages
396
Econoline Oil Filter Adapter

Got the engine and trans settled in.
IMG_4821.JPG

The Econoline oil filter adapter seems to fit fine. Here's a picture of it, along with a sketch of the bolt if you need to machine one up if you happen to find just the casting.
IMG_4831.JPG

Here are the filters I looked at using. The standard Ford 51515 was too big of diameter at the end, hits oil pan, can't use. The short 51335 does fit, as well as the 51516 and 51764. According to Wix's catalog, the 51764 is slightly bigger, but in reality the nut is included in the height, so really only a hair bigger than the 51516. I used the 51516 filter, probably has more filter area than the shorty 51335.
IMG_4839.JPG

Here are a couple pics of installed 51516 filter. About 1/8" from motor mount and 1/4" from oil pan. Probably won't work with headers if #5 & #6 tubes go in front the motor mount.
IMG_4835.JPG

IMG_4837.JPG
 

KenF

Gold forum user
Messages
396
Derale 17015 Fan

Got the pulley on the water pump (Mustang C40E-8505-A off eBay) aligned with the crank pulley and installed. Basically had to press the pulley hub about 1/32 inch away from the housing and seal. Bolted up the Derale 17015 fan, which promptly hit the lower pulley, easily adjusted by bending each blade slightly in the direction it flexes. Now it hit the steering rack, so begin trimming the fan blades. Scribed a line from the end of the blade mount and cut off about 5/16 inch from the end of the blade, hopefully equal weight being removed from each.
IMG_4843.JPG

After test fitting found that as blade flexes forward the trailing edge of the blade then hit the rack. Made a template to scribe a line for another cut.
IMG_4845.JPG

Now it has about a 1/4 inch clearance from the rack, and at least 1/2 inch around the factory fan shroud. Hope the balance is okay.
IMG_4846.JPG
 

Warren

Gold forum user
Messages
3,872
LAT

Seen a couple 6 blade LAT style ones on ePay for a reasonable price. Plus a pal has one in Nevada. Hard to add patina to those stainless steel blades :) Let's see the pulley you bought. I lost patience and bent up a 3 sheave Fairmont one, did not realize it was anything other than ugly. 4 members make reduced pulleys as well, only one selling in parts section three are members.
 

KenF

Gold forum user
Messages
396
Hard to add patina to those stainless steel blades :) Let's see the pulley you bought.

Nope, just had to buy a water pump, using the pulleys that were on the car. Likely the old fiberglas fan was added after a water pump change, and they noticed the original fan flopping around on the hub. Car didn't have the Tiger pulley hub.
IMG_4847.JPG

Painted the stainless on the fan after sanding and etching, we'll see how long that POR-15 lasts. :rolleyes:
IMG_4849.JPG
 
Top